Giving nuance to a PBR texture across an environment is a common challenge. One solution to this is to use blended textures. Here I describe my process for generating artwork which features such a texture.
Maya ShaderFX
One of the issues facing our workflow is that there is no currently compatible multi-layer shader format which exists between DCC packages and engines such as Unity/Unreal. So what we have to do is build an analog of the final shader that we are going to use in our game engine, so that we can preview what our final output shader will look like, whilst still having the context and tools of our DCC scene. In Maya, we use a ShaderFX graph to build such a shader.
The structure of the graph is quite basic. Essentially, we have three texture maps. We use two cascading lerp nodes (linear interpolation) to feed these to the diffuse property of our output shader. We use the red channels and blue channels of our geometry vertex colors, to control the texture amounts, by using the VertexColor node.
We can use Maya’s Paint Vertex Color Tool to apply the vertex colors.The vertex colors then drive the blending amounts for each of the three textures.
We can export this result directly to our Unity project.
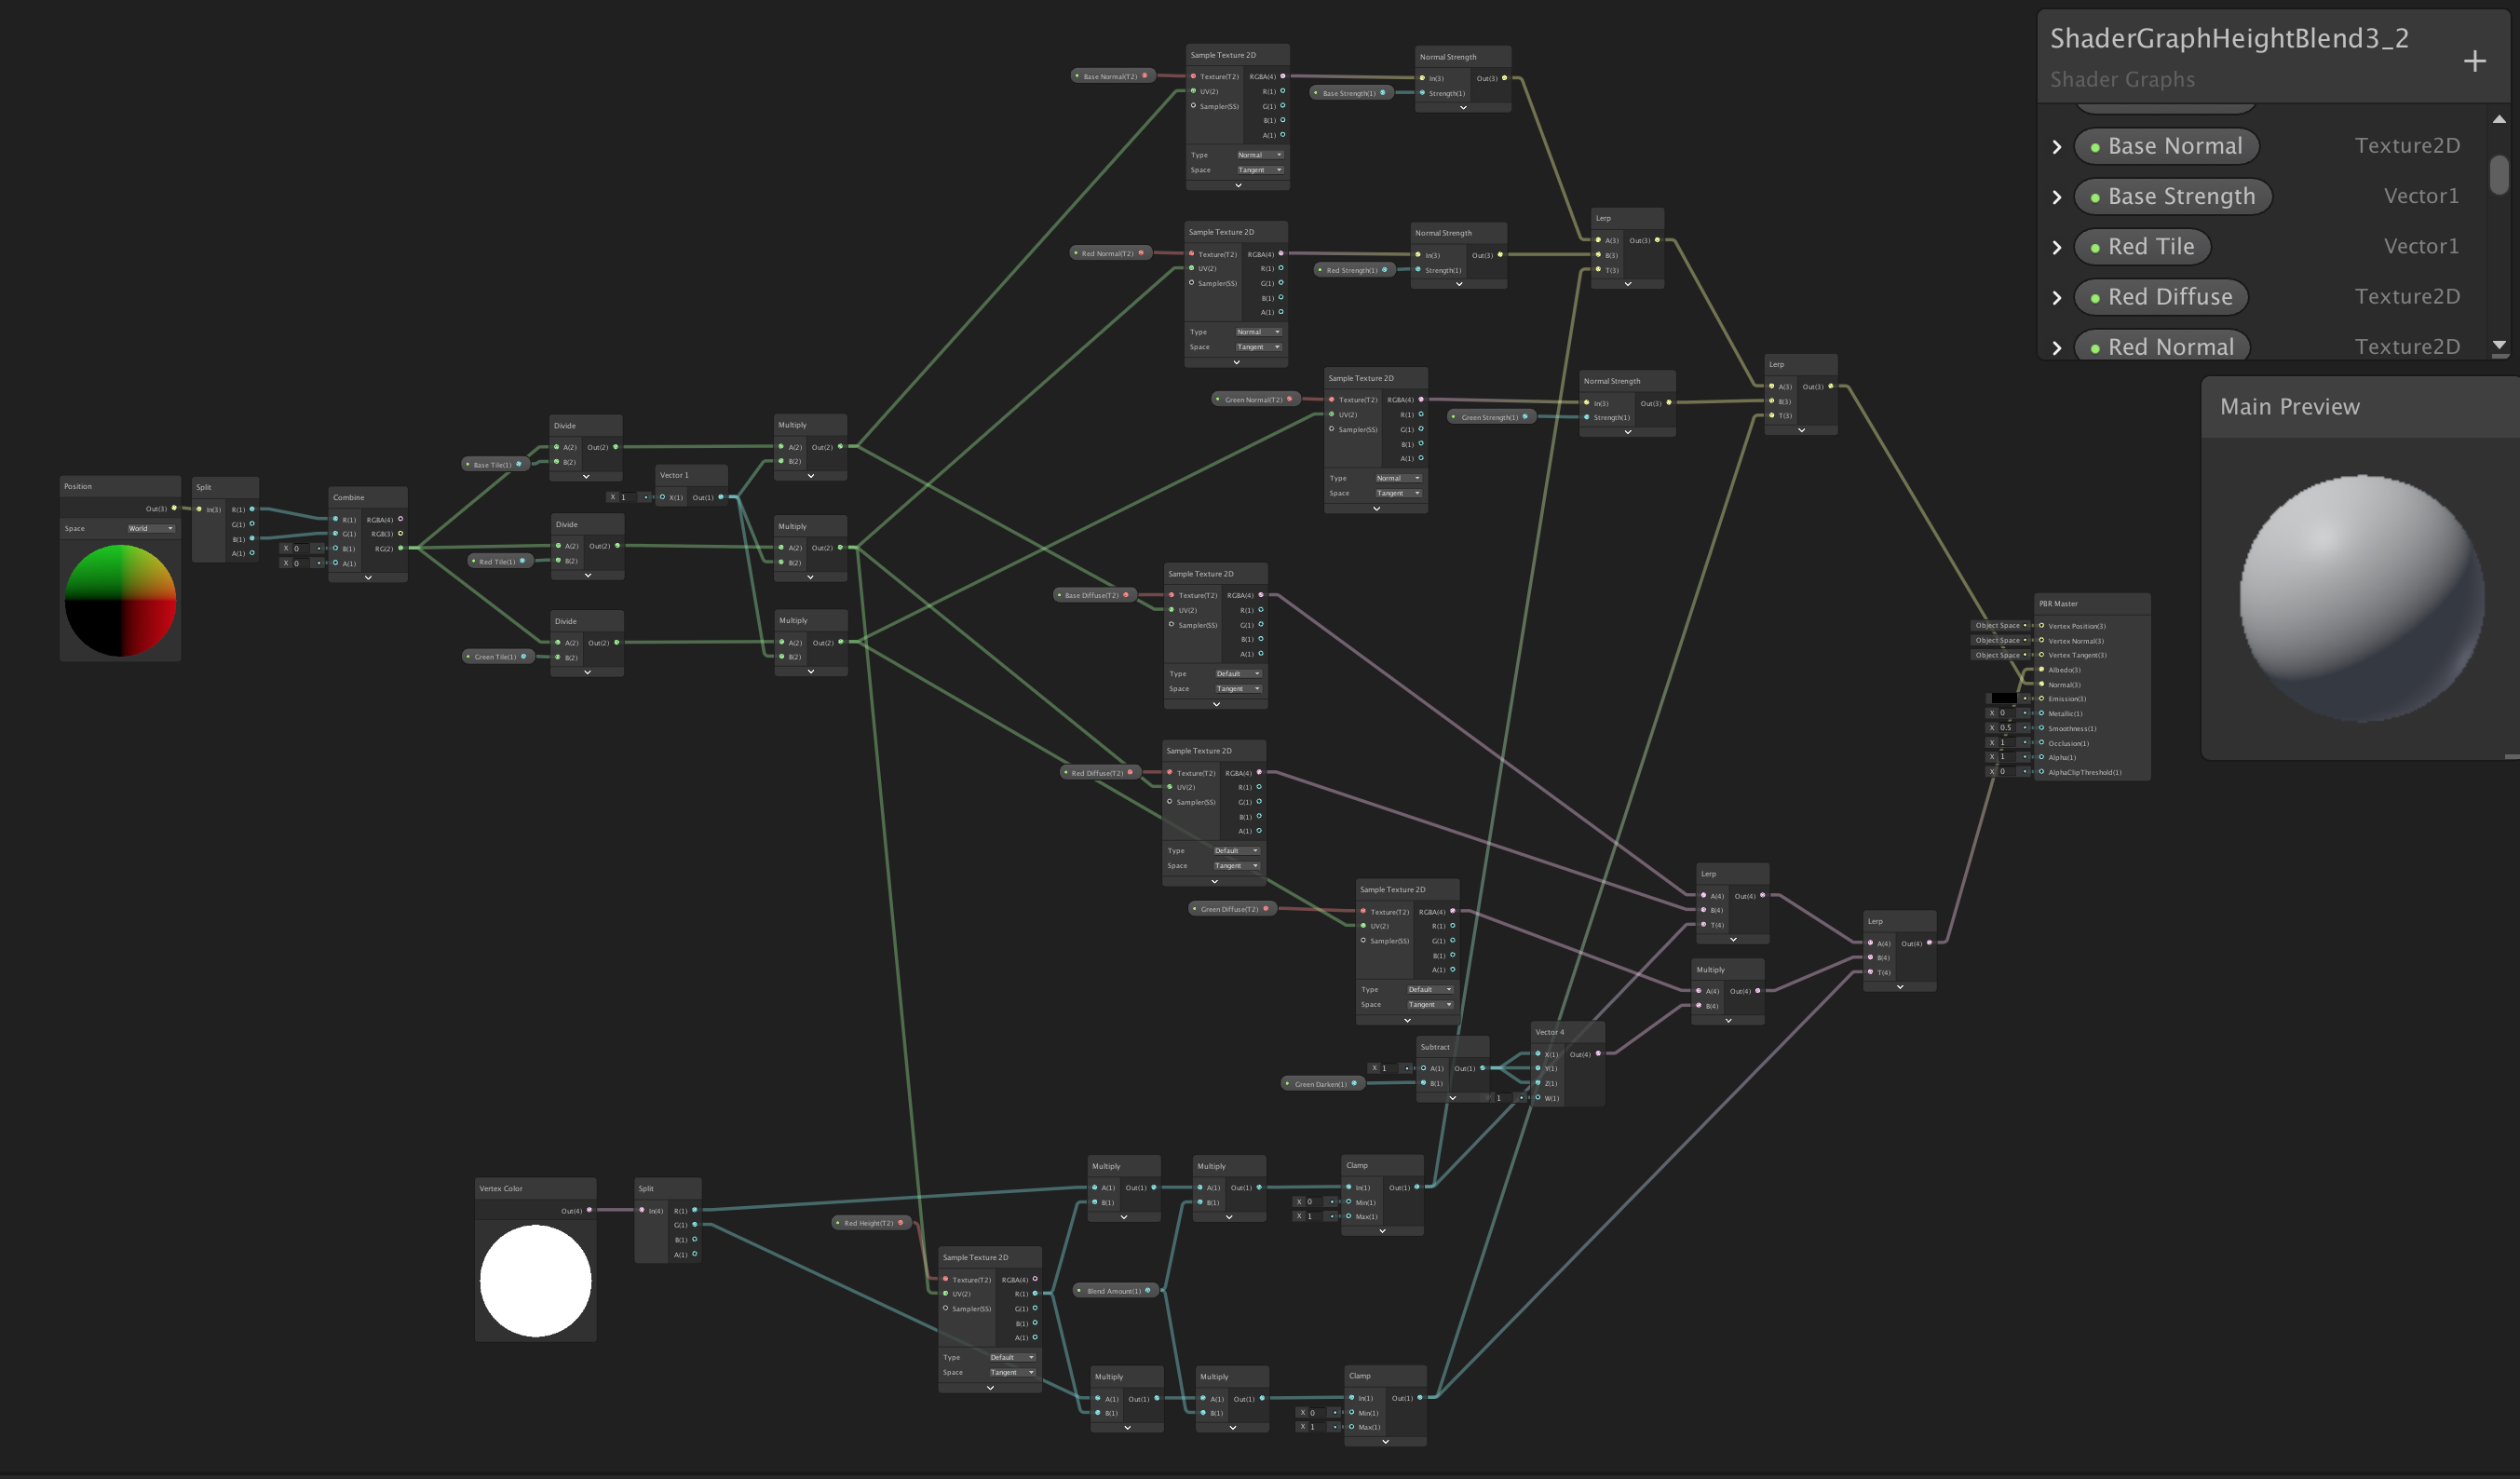
Unity Shader Graph
The Unity shader is a bit more of a beast as we have added extra parameters to give us fine control over the output.
UV Mapping
We use a reference to world space to give us uv values. This makes it simple to add new to our Unity scene while retaining a seamless map. Each of the three textures has it’s own scaling parameter.We blend between our three textures using this cascading lerp structure, similar to the one we created in the ShaderFX graph. Again, the blend amount is controlled by the vertex colors.This particular shader uses a height map assigned to the red channel to a driver to multiply the blend amount sent to the lerp nodes. This has the effect of making the other textures flood the lowest parts of the red texture. The result is far more organic than just a simple linear blend.The diffuse textures also use a lerp cascade. I added the further nuance of an extra property assigned to the green channel which has the effect of darkening that texture. This allows us to control the brightness of the dirt texture we can choose to assign to that green channel. The outputs of the two lerp cascades are fed into the PBR Shader node.The final result shows us that we can achieve nuance and variation across a large surface by blending these three different textures and their associated normal maps together. You can see how in areas, where the concrete/dirt is not 100%, the textures fill the cracks in the red channel tiling texture.
While this workflow uses a three layer texture format, the technique can be extended for use of up to five textures, with RGBA and black all being associated with a texture. However, seeing as we might be targeting a real-time output format, we have to consider optimization for our final shader, so it’s a balancing act.