
The Project Brief
In working with higher education institutes, I developed a series of art tests that would allow students to create basic assets to show off their skill levels.
- A piece of Victorian technology that fuses together organic and machine parts. It has malfunctioned and the organic part is starting to rot – the best ideas will be based around the form following the function.
- A dying camp-fire that is surrounded by the detritus of the previous night’s occupants – think glowing ember shaders, particle smoke, rugs and empty food containers
- A futuristic crate/containment unit designed to hold a very dangerous liquid substance. Someone has tried to open it. They tried bullets, sledge-hammer, explosives, tried cracking the code on the access panel, and now the substance is leaking out.
- A classic red telephone box, but this one has been partially destroyed by an explosion/incendiary device – glowing embers would be good to mix in, but also, the twisted form of what remains of the telephone box must show the force of the explosion.
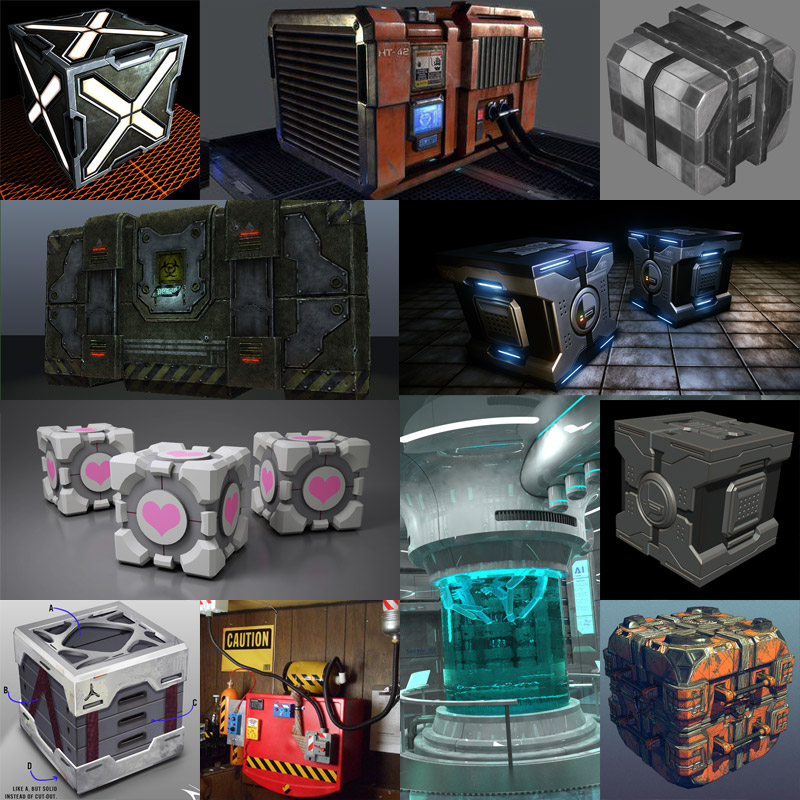
As a demonstration, I decided to have a go at tackling brief number 3. The crate is one of the classic game assets. The production of a modelled crate in a game art portfolio has long been used as a measure of the capability of an artist. It’s a very useful asset that can be utilised in a broad variety of games, from side-scrolling platform games to first-person shooters. It also shows a presence in historical, contemporary and futuristic scenarios. However, because of its simplicity, in its most basic form, the crate cannot be used to truly impress a prospective employer. But, by extending the brief for what we want out of a crate, it is still possible to produce something that can show off a good solid variety of asset-creation skills.
Research
So, The first stage in developing our crate was to do some research into existing work, and to come up with a vague concept of how we might approach the problem. Then, we would be able to sketch out some ideas. I looked at what 3d work is out there already, and also looked at some real-world industrial objects.
Production Design
Based off the research and the brief, it was then possible to start designing my crate. The essential elements in my crate would be:
- It would have to be stackable.
- Crates get bashed about, so reinforcement would be needed in the exterior.
- Aesthetically, I wanted to go for something chunky.
- I’d be looking for an interesting way to open the lid rather than just a flat panel.
- The lid section would have to incorporate a tablet interface for security.
- The whole crate needs to be badly damaged.


In the initial ideas, I veered towards a containment unit design.

I decided to stick more rigidly to the crate idea to keep things simple.

Eventually settling for a rectangular unit, loosely based on the design for the Companion Cube from ‘Portal’.
Tools
A variety of software tools would be used to build my model:
- 3d Studio Max: principal modelling & uv-mapping
- Adobe Photoshop: textures
- Zbrush: detail modelling and texturing
- Substance Painter: textures
- XNormal: texture baking
- UDK/Unity: testing the model in-game
Initial Model
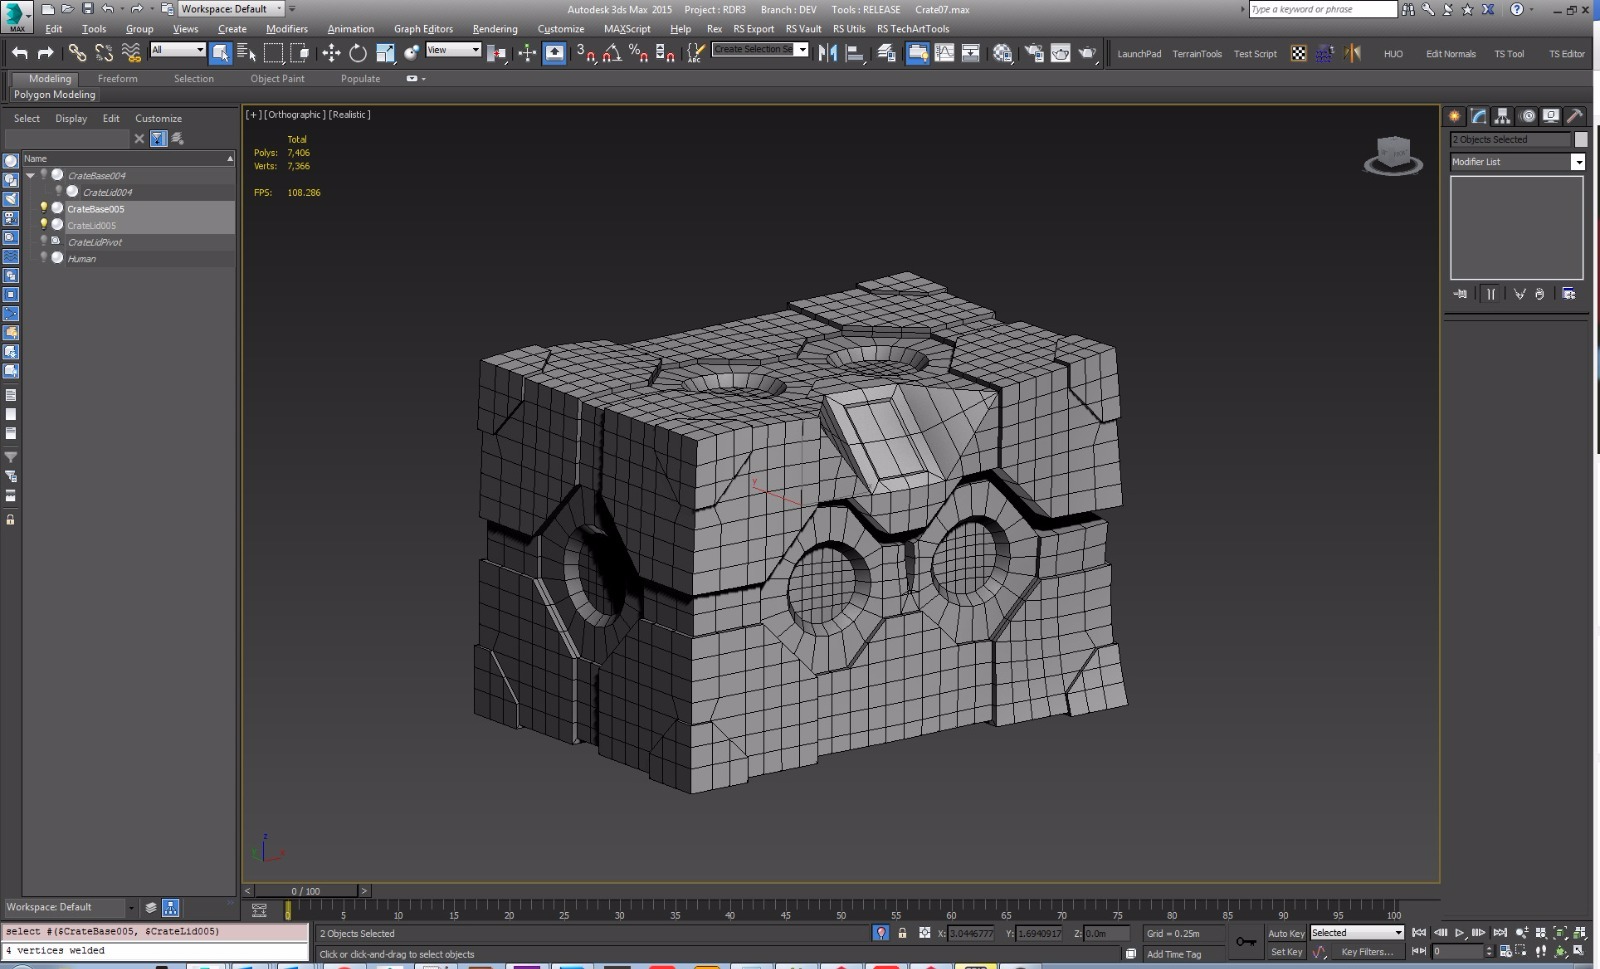
The first stage was to develop the undamaged version of the crate. Using the mirror modifier in 3ds Max, it was quite straightforward being able to build a bigger model, while concentrating on a smaller component. I decided not to put bevels into the topology for now so that I could keep the model manageable and low poly for ZBrush.

After building the initial model, I then separated the lid so that I could work on the interior. With the basic model built, I could then start working on the damaged variation. I then increased the topology so that I could use FFD modifiers to distort the form of the crate, and I added some simple dents and splits into the mesh. The whole crate being bent would require curvature on the surface. I could put more damage detail into the mesh using ZBrush.

UV-mapping and material ID’s were set up in 3ds Max to prep the model for Substance Painter.

